Sunday, October 23, 2011

ladybug party

 This year I did a ladybug theme party for my daughter. I made party hats for all the girls using scrapbook paper and cut up boa's. I also made the medallions from a tutorial I found at the TomKat Studio.

 Each girl had a ladybug coloring page, her party hat, and a box of crayons.
 I kept the treat table simple but also decorated with a few tissue pom, ladybugs, and balloons.

 I dipped Oreo's in red and brown candy melts and added my non perils for a ladybug look.

I made the labels for the water bottles as well.

 I had a cute ladybug on one of my cricket cartriges that I used throughout the party

 chocolate and powdered doughnuts to go with the polka dots in the party.

more ladybugs for cupcake toppers. I also used all my fun red and white scrapbook paper I'd been accumulating over the past year to make the cupcake wrappers.
 I love my new stand I found at HomeGoods. Some one had stripped the screws on it so it was really wobbly. I got it for a discount and went home and glued them in place and it's as good as new.


The girls got to take these ladybug takeout boxes home full of treats from the table.
 I also made these ladybug hair clips for each girl and the card they were clipped to.
 The girls had a lot of fun, maybe as much fun as I had putting this all together.


I'm linked up at:
Today's Creative Blog
Tip Junkie 
Whipperberry

Ruffles and Burlap

 For our Relief Society meeting this month we did a let's talk turkey night. We had a great Thanksgiving dinner and some "how to" classes, it was a great evening. As part of that night they had a table with different place settings that people had signed up to bring to show different ways to set your table. I signed up to bring one of those settings.


Of course fall colors were swirling around in my head but then I realized I don't have a "fall" plate setting. What do I have? I have my Crate & Barrel dishes that I have yet to use. They're a white ruffle'y' looking plate and that's where my inspiration came from.

I decided to go with ruffles and burlap. I've wanted to do a project with burlap for a long time and knew this would be perfect. I went to Joann's to buy my burlap and some white fabric, burlap is really inexpensive which I'm thrilled about. (now I can do more projects in burlap)

First I used an old placemat to get the size I wanted. I made it a little wider than normal because I knew I was adding a ruffle to the edge. I frayed the edges a little and made a ruffle out of the white fabric. I then glued that to one edge.


I also made a napkin ring from a tp roll by gluing some burlap around it and adding a small ruffle.


  I wanted to add something fun to the wine glass and so I made this ruffle flower.
 The place card was just a tag which I stamped and tied to a pine cone.

 I had made apple crisp for my YW activity so I thought it would be fun to add a single dessert serving to the place setting. I wrapped the jar in twine and added the label.


 I love how it all turned out and will now be making enough settings for a dinner party that I need to have in the near future.
I'm linked up at:

Today's Creative Blog
Tip Junkie
Whipperberry

Wednesday, October 5, 2011

A little Halloween

I have been SO excited to decorate for Halloween this year. I've been collecting things and ideas since the end of August. I've finally got the house in enough order and most of it unpacked that I couldn't wait any longer. I'm only about half done, I still need to do out side and get some pumpkins but for now this will hold me over.

I pinned a lot of ideas on Pinterest and these are some that I actually did.


 I made my own spell book from a old dictionary I found at DI. I made my spell pages in Printshop and distressed them to make them look old and well used. I turned the corners of the book and sprayed random pages with a water. I also used my brown ink to make it look older. I love how it turned out!!
 I also used some inspiration I saw at Pottery Barn. I've been collecting apothecary jars from HomeGoods for a few months knowing what I wanted to use them for ~ best place to buy them!
 The skulls I found at Michaels and grabbed them right away and the crow I found at Dollar Tree.

 I also found a tulle wreath on Pinterest and knew I wanted to make my own. I added some ribbon I found at Michaels and a glittery spider.
 I used my favorite frame from Hobby Lobby to put a print from Less Cake More Frosting that she designed. I'm still searching for a square bowl to put on top of that candle holder and paint it all black so I can stick in a white pumpkin. I made the small stand from a candle plate and candle stick I found at the Dollar Tree.
 Love this Spooky sign from Michaels.


Like I said I'm still working on my outside entry but I do have my lantern out for now.
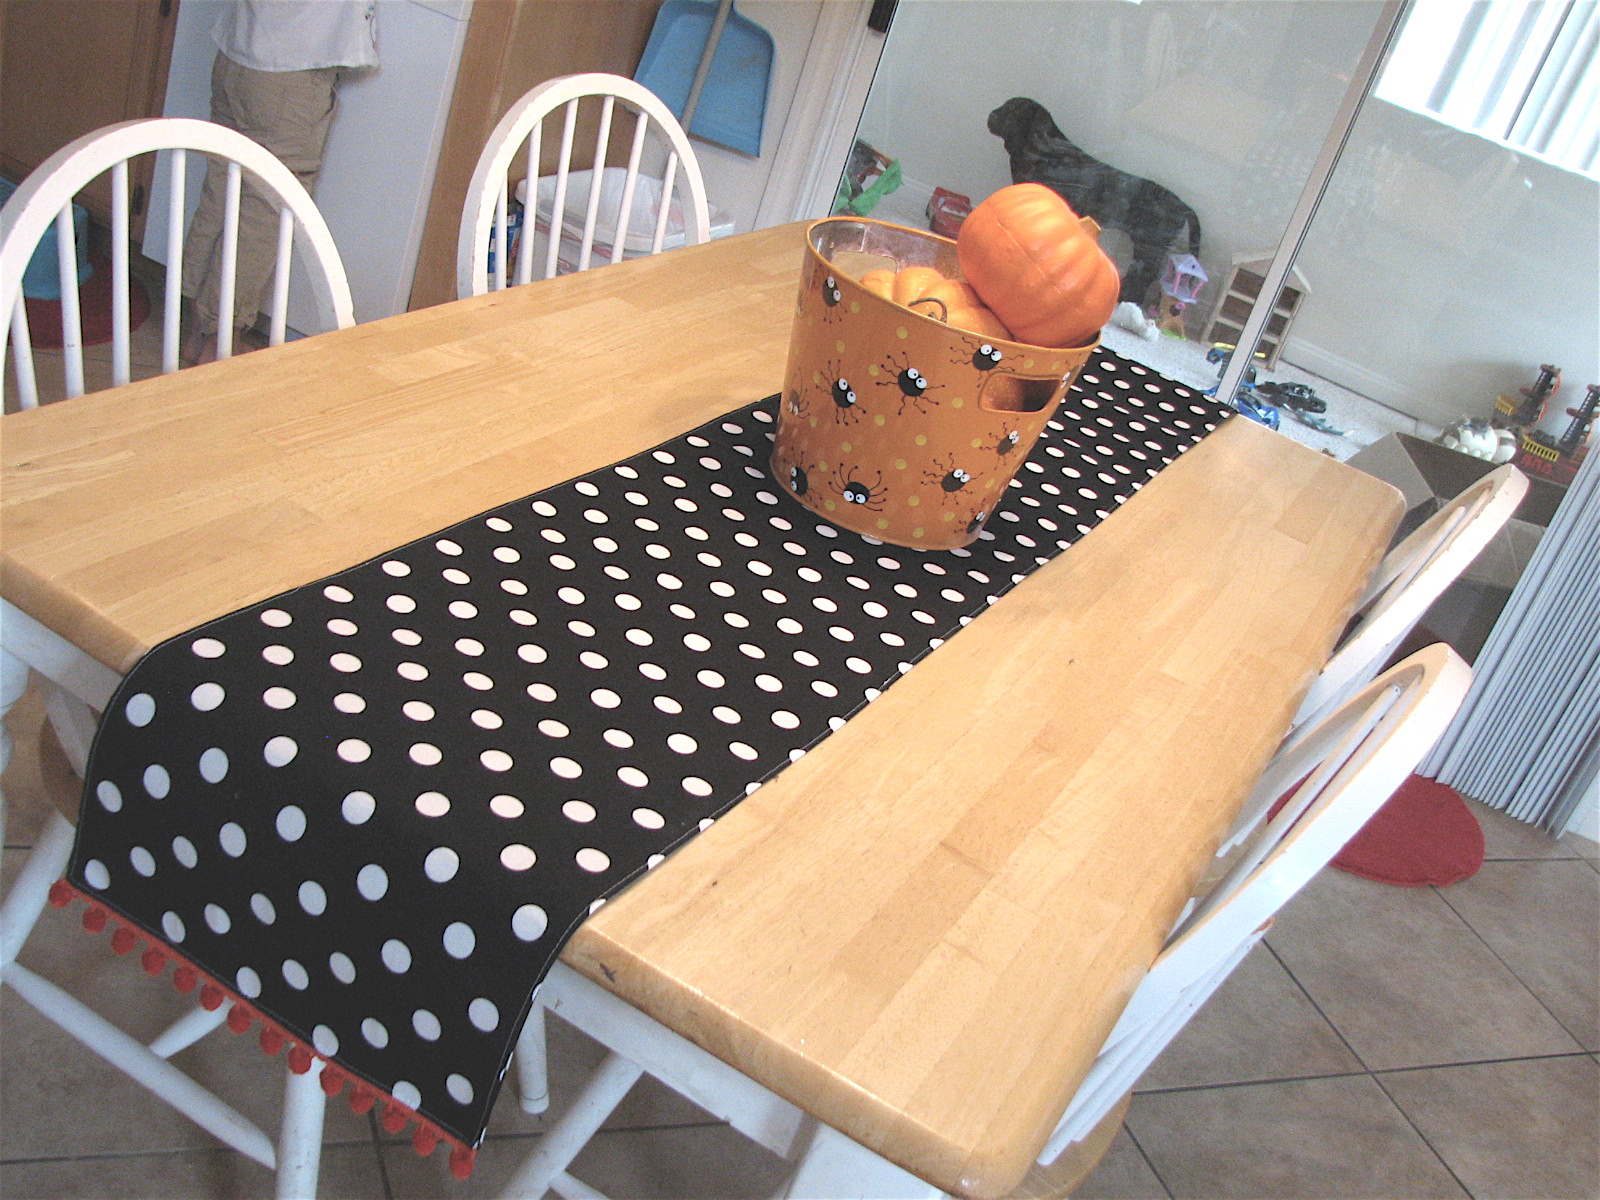
 I saw this table runner at the Polka Dot Market and LOVED it!! But the price was a little high so I figured I could make my own and I love how it turned out. I'm planning on putting 3 white pumpkins with vinyl "Trick or Treat" on them to go on top but I'm still waiting on the vinyl to arrive that I ordered so I'll show ya that once it's done.

I still have more to do. I'm making my specimen jars and of course waiting on my pumpkins and a few other spooky things but this will get me started. Hope you enjoyed it!


I"m linked up at Whipper Berry 
and at TaterTots & Jello 
and Today's Creative Blog
and Tip Junkie

LinkWithin

Related Posts with Thumbnails